How To Guides
Foiling with minimum supplies!

Nov
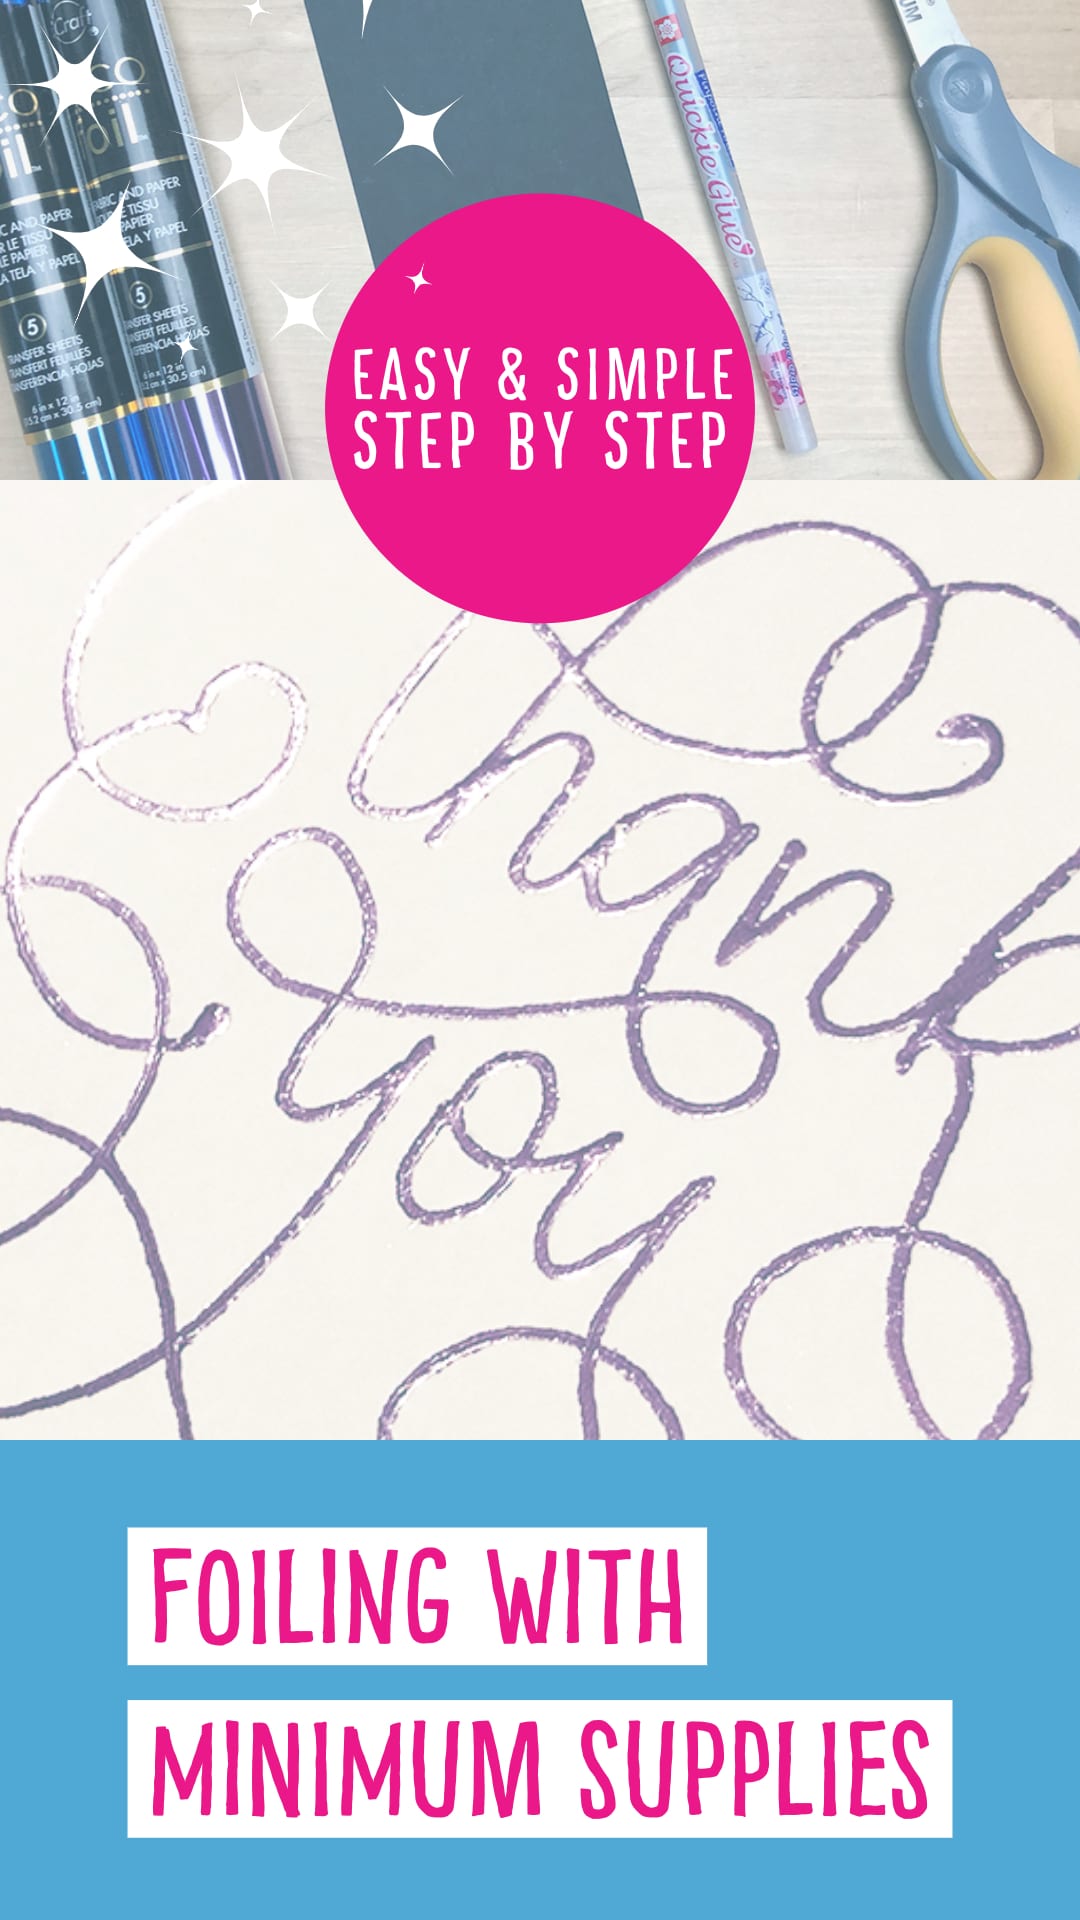
Want to foil your lettering but not wanting to spend too much money? In this article, I’ll show you exactly how to foil with minimum supplies. It is super easy and fun, and the result is beautiful!
Here’s a video from Instagram where I used this easy and inexpensive technique.
Supplies:
Paper
You will need paper or another surface where you want to apply your foiled lettering.
Glue Pen
I am using this one:
Foil Transfer Sheets
I am using these:
Step by step instructions:
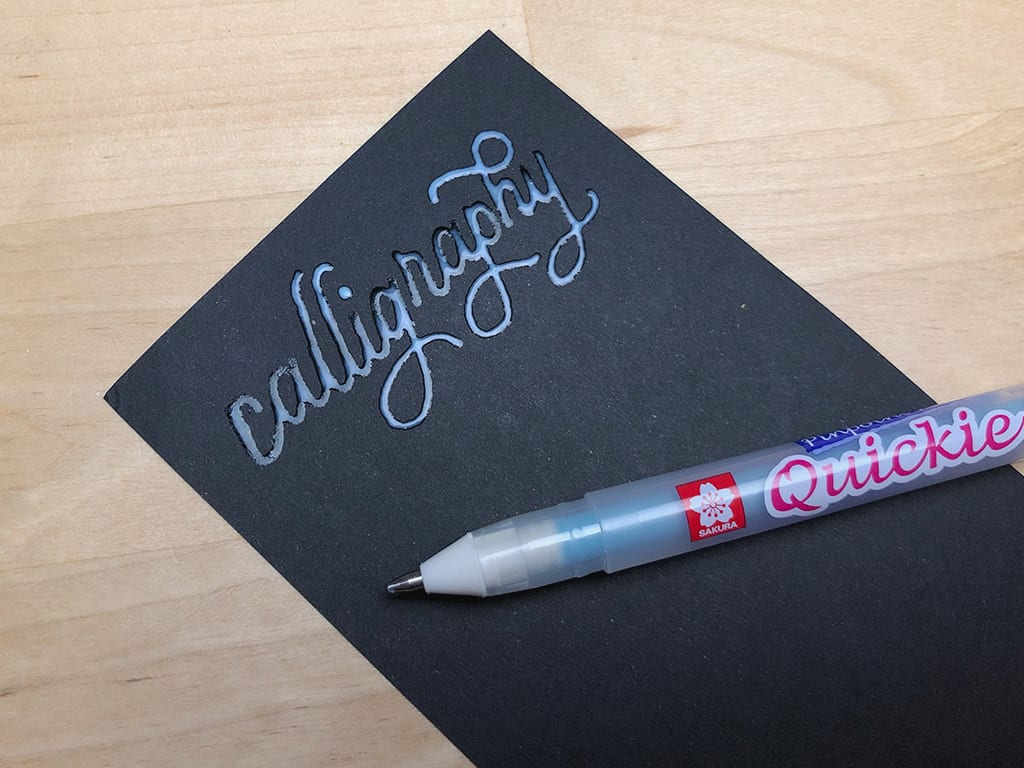
Step 1:
On your desired surface (paper or other), create your lettering using your glue pen.
TIP: You can sketch out your design first using a pencil.
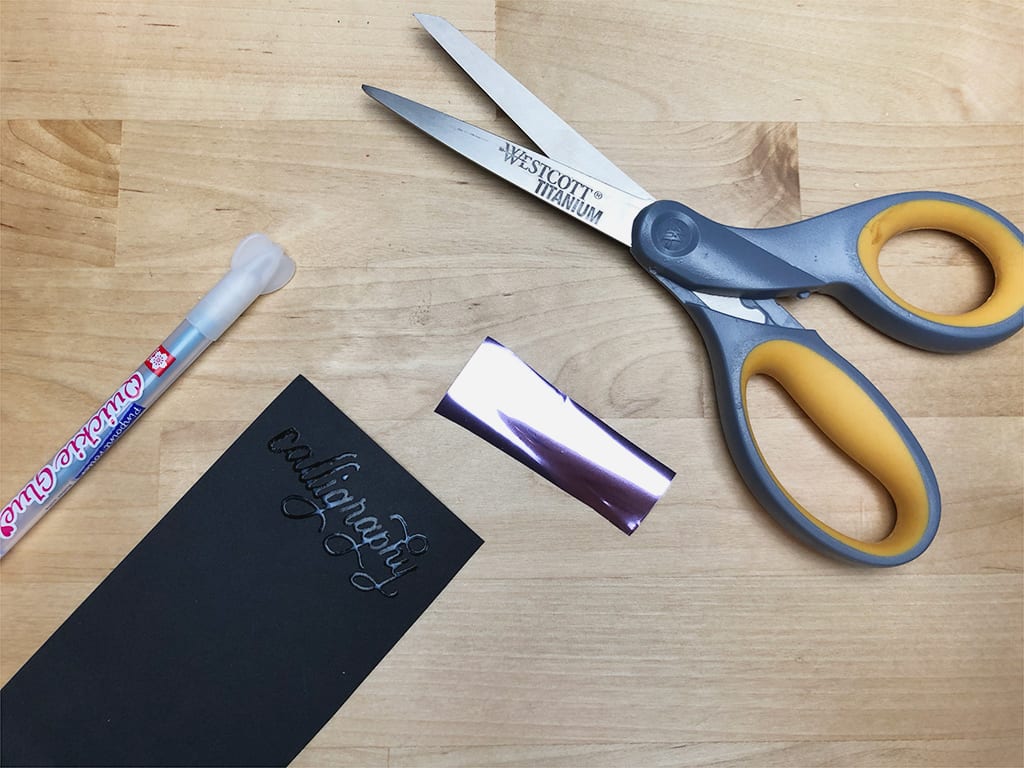
Step 2:
Let your glue dry while preparing a piece of foil big enough to cover your design.
TIP: You can use more than one color by cutting pieces of foil of different colors.
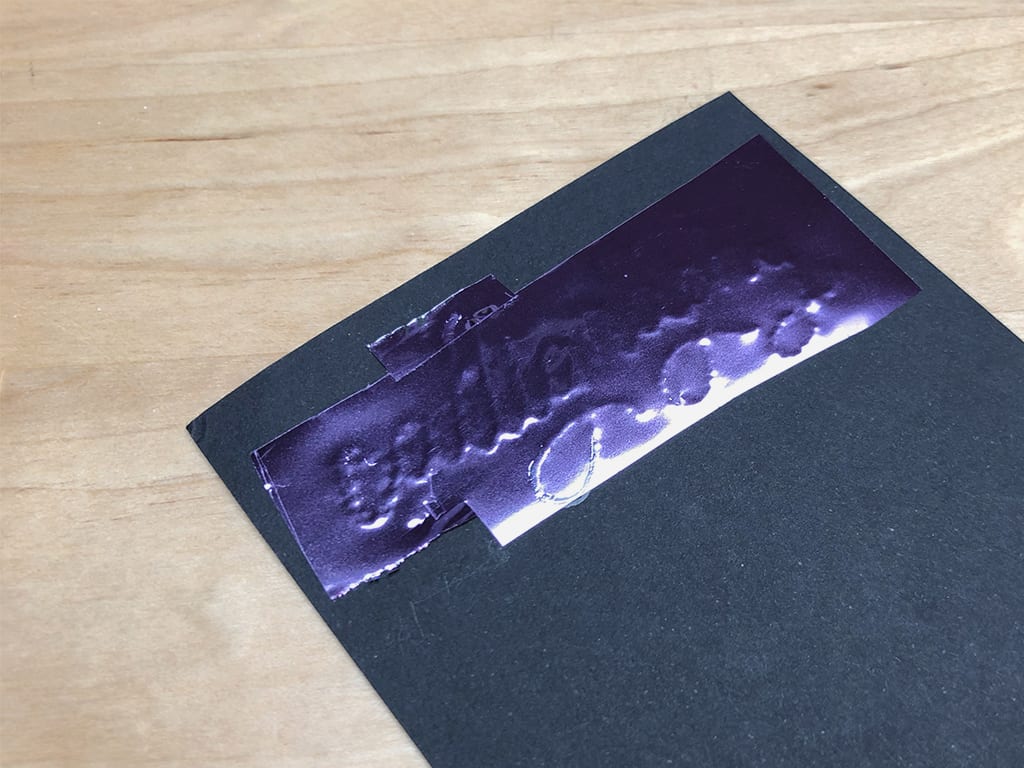
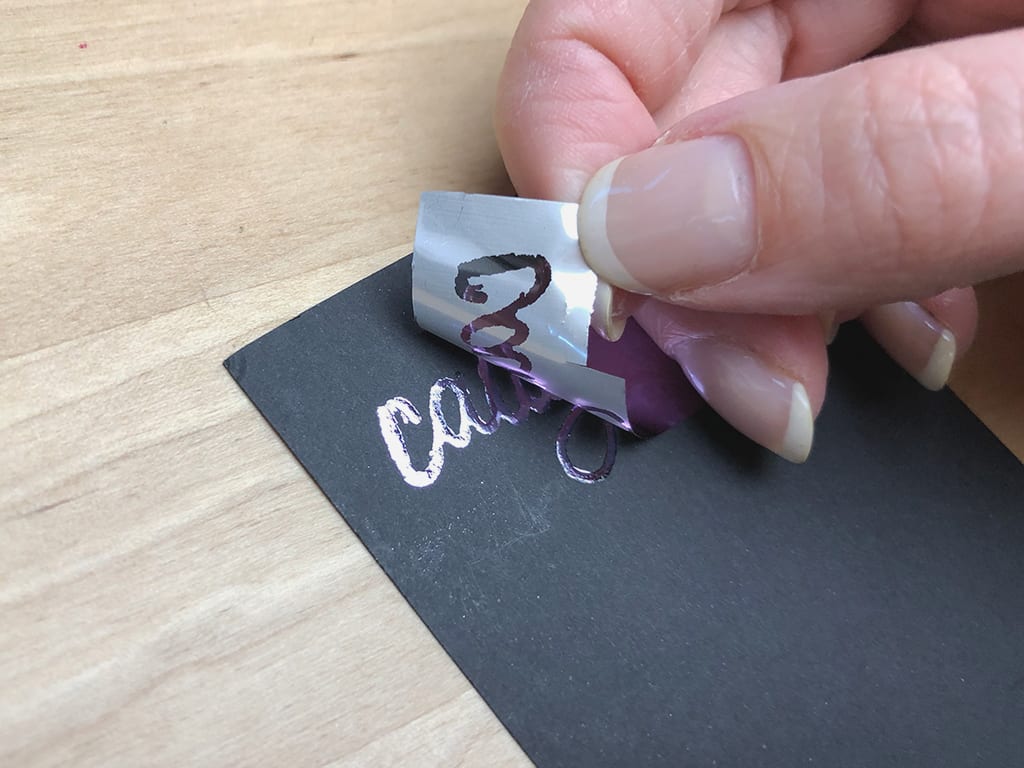
Step 3:
With your glue dry, add the foil carefully on top of your design and then use your finger to rub the foil onto the glue-design.
TIP: Make sure to rub the foil really well into the glue for best result.
Step 4:
Carefully – and starting in one corner – drag the foil off to reveal your beautiful finished foiled lettering design.
This is the result, in video format because it better captures the shine!